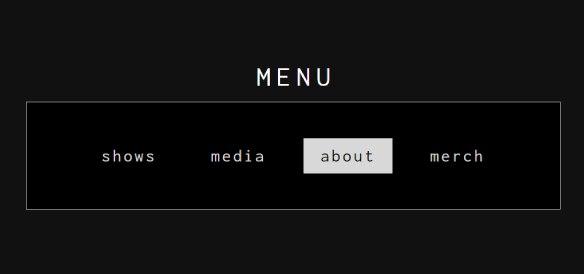
In this post we are going to show you how to create a Animated Menu Using only CSS Pseudo Elements. these effects can make your site feel much more attaractive. you can use this effects in your projects.
The structure of markup is very simple. Create a navigation ul li that will have our all the list.
<div class="nav">
 <ul>
   <li class="home"> <a href="#" data-glitch-text="Home"> Home </a></li>
   <li class="tutorials"> <a href="#" data-glitch-text="tutorials"> tutorials </a></li>
   <li class="About"> <a href="#" data-glitch-text="About"> About </a></li>
   <li class="Newsletter"> <a href="#" data-glitch-text="Newsletter"> Newsletter </a></li>
   <li class="Contact"> <a href="#" data-glitch-text="Contact"> Contact </a></li>
 </ul>
</div>
After creating our markup we’re going to set our style.
We set the general rules for our class and then we are going to add a special class with the desired effect styles.
/*--first include your font--*/
@import url('https://fonts.googleapis.com/css?family=Open+Sans:400,600,700');

*{
    margin:0px;
    padding:0px;
}

.nav ul {
      list-style:none;
      background-color:#000;
      text-align:center;
      padding:0px;
      margin:0px;
}

.nav ul li {
      display:inline-block;
      font-size:0px;
}

.nav ul li a {
      display:block;
      font-size:18px;
      padding:20px;
      font-weight:bold;
      color:#fff;
      font-family:'Open Sans', sans-serif;
      text-decoration:none;
      position:relative;
      transition:color .35s ease, background-color .35s ease;
      z-index:3;
}

.nav ul li a:before,
.nav ul li a:after {
      display:none;
      content:attr(data-glitch-text);
      position:absolute;
      top:20px;
      left:0;
      height:100%;
      width:100%;
      opacity:.8;
    }

.nav ul li a::before{
      color:#0ff;
      z-index:-1;
    }

.nav ul li a::after{
      color:#f0f;
      z-index:-2;
    }

.nav ul li a:hover::before,
.nav ul li a:active::before,
.nav ul li a:focus::before{
      display:block;
      animation:glitch 0.6s cubic-bezier(0.25, 0.46, 0.45, 0.94) both infinite;
    }

.nav ul li a:hover::after,
.nav ul li a:active::after,
.nav ul li a:focus::after{
      display:block;
      animation:glitch 0.6s cubic-bezier(0.25, 0.46, 0.45, 0.94) reverse both infinite;
    }

@keyframes glitch{

0%  {-webkit-transform:translate(0);
      transform:translate(0);
    }

20%  {-webkit-transform:translate(-.15rem, .15rem);
      transform:translate(-.15rem, .15rem);
     }

40%  {-webkit-transform:translate(-.15rem, .15rem);
      transform:translate(-.15rem, .15rem);
     }

60%  {-webkit-transform:translate(.15rem, .15rem);
      transform:translate(.15rem, .15rem)
     }

80%  {-webkit-transform:translate(5px, -5px);
      transform:translate(5px, -5px)
     }

to  {-webkit-transform:translate(0);
      transform:translate(0)
     }
}
And now we can see our menu effects.
I hope that you liked this simple animated menu effects. Thanks and keep visting 🙂